Setting up a webhook for lead form extensions in Google Ads needs to be on your to-do list because it will notify you when you have a new lead. As you already know in Internet marketing services, it’s important to follow up on leads quickly because the longer you wait to contact a lead, the lower your chances are of converting them to a customer.
With the recent changes to Google Ads, users do not receive automatic notifications when they receive an ad unless they set up a webhook using the lead form generation extension. By following these step-by-step instructions, you will receive notifications every time you receive a new lead and have the chance to follow up quickly to secure them as a customer. So, are you ready to get started?
Step-by-Step Instructions to Set up a Google Ad
Let’s go through the steps to create a Google Ad followed by a webhook.
Go your Google ads account, choose the campaign you like to add the extension, click on
Ads & Extensions -> Extensions -> Add “Lead Form Extension” (Beta)

The following extension with a message icon will be shown up beside the phone extension, on the search ads. You’ll notice that the new extension is still in Beta, so it will likely change because Google is working on it for the final version.
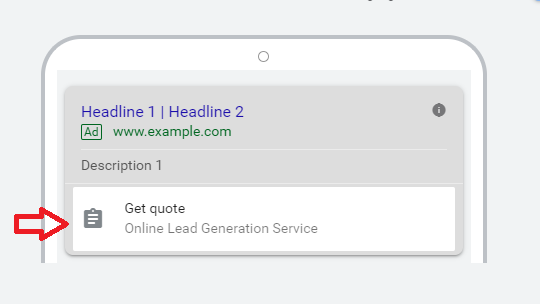
Tap on the prompt to see the “Get Quote” form.
Next, you will need to create a short, engaging message designed to catch attention followed by a statement motivating users to do something (referred to as a call-to-action).

The next step is creating a form for user’ details with the following information:
- Name
- Phone
- Postal Code
There are additional fields you can populate to add more information and credibility to your ad including:
- A headline
- The business name
- A description (in 200 characters or less)
- Privacy policy
- Background image
- Call to action

The lead form extension will look like this on a mobile phone:

After submitting the Lead Form Extension, Internet marketers have the following options:
- Redirect users to to the thank you page
- Let the user download a file
- Show a thank you message

The thank you message will look like this on a mobile phone:

How to Set up a Webhook for Google’s Lead Form Extension (and Increase Your Chances of Converting Leads)

There are many ways of creating a webhook. However, our development team at Zigma Internet Marketing recommends creating a PHP webhook to be compatible with most websites (i.e developed on WordPress on Apache or Nginx servers).
To add a webhook PHP file to your WordPress server:
- Go to your files manager or FTP and a create a file. Name it webhook.php and save it on the root of your domain folder.
- Add the following PHP Webhook commands to webhook.php file to connect your WordPress server to Google Ads:
<?php
$Google_data = file_get_contents(“php://input”);
$decoded_data= json_decode($Google_data, true);
$pass=”Key Used in Form Extensions“;
if ( $pass == $decoded_data[“google_key”]){
$lead_id = $decoded_data[“lead_id”];
$campaign_id = $decoded_data[“campaign_id”];
$bodyemail .= “Name: ” . $decoded_data[“user_column_data”][0][“string_value”];
$bodyemail .= “<br>Phone: ” . $decoded_data[“user_column_data”][1][“string_value”];
$bodyemail .= “<br>Email: ” . $decoded_data[“user_column_data”][2][“string_value”];
}
$bodyemail .= “<br>Campagin ID: “. $campaign_id;
$bodyemail .= “<br>lead ID: “. $lead_id;
//Change with your emails
$emailfrom = “your WordPress Email Address as sender“;
$emailto = “Your Email Address“;
$subject = “Google Ads | Lead form extension”;
$headers = “From: ” . $emailfrom . “\r\n”;
$headers .= “Reply-To: “. $emailfrom . “\r\n”; //Optional
$headers .= “MIME-Version: 1.0\r\n”;
$headers .= “Content-Type: text/html; charset=utf-8\r\n”;
@mail($emailto, $subject, $bodyemail, $headers);
}
?>
Update the code in bold with your own information.
To create a Lead Form Extension, follow these steps:
-
-
- Go to Google Ads -> Your Account -> Ads Extension.
- Click on Add new extensions and select “Lead Form Extension.”
- Choose a call to action from the drop-down section that encourages people to engage with your business or service.
- If it’s a service you are offering, choose “Get Quote” or choose other CTA that fits your business.
- Add a text for the extension. The copy will show on the ad, so create a short and engaging message encouraging users to opt in.
- Go to the form section and add a headline to your form. This headline should encourage users to complete the form like, “Get 20% off on HVAC Repairs.” The title should be less than 30 characters long.
- Add your business name.
- Describe your service or product (and your differentiators) in 200 characters or less.
- Add your privacy policy URL from your website.
- Add a submission message(describe what happens now, and what should the user expect).
- Choose an appropriate call-to-action (such as a download if you have a file ready for the user to download) or send them to your thank you page on the website by choosing “Visit Website.”
- Click on the “Lead Delivery Option.”
- Enter the webhook.php URL (yourdomain.com/webhook.php).
- Enter the key you have in your webhook.php ($pass=”Key Used in Form Extensions”;).
-
How to Test and Troubleshoot the Lead Form Extension Webhook
If you have uploaded the webhook to your server and created a Lead Form Extension, click on “SEND TEST DATA” below the “Manage your leads with a webhook (optional)” section. Shortly after, you should receive a test email from Google Ads if the webhook was set up correctly. If you do not receive an email, check your junk and spam folders.
We recommend using a PHPMailer to ensure your emails are not flagged as spam.

If you would like to mention the name of the campaign in the email body sent from webhook, please contact us for assistance to set up this helpful feature.